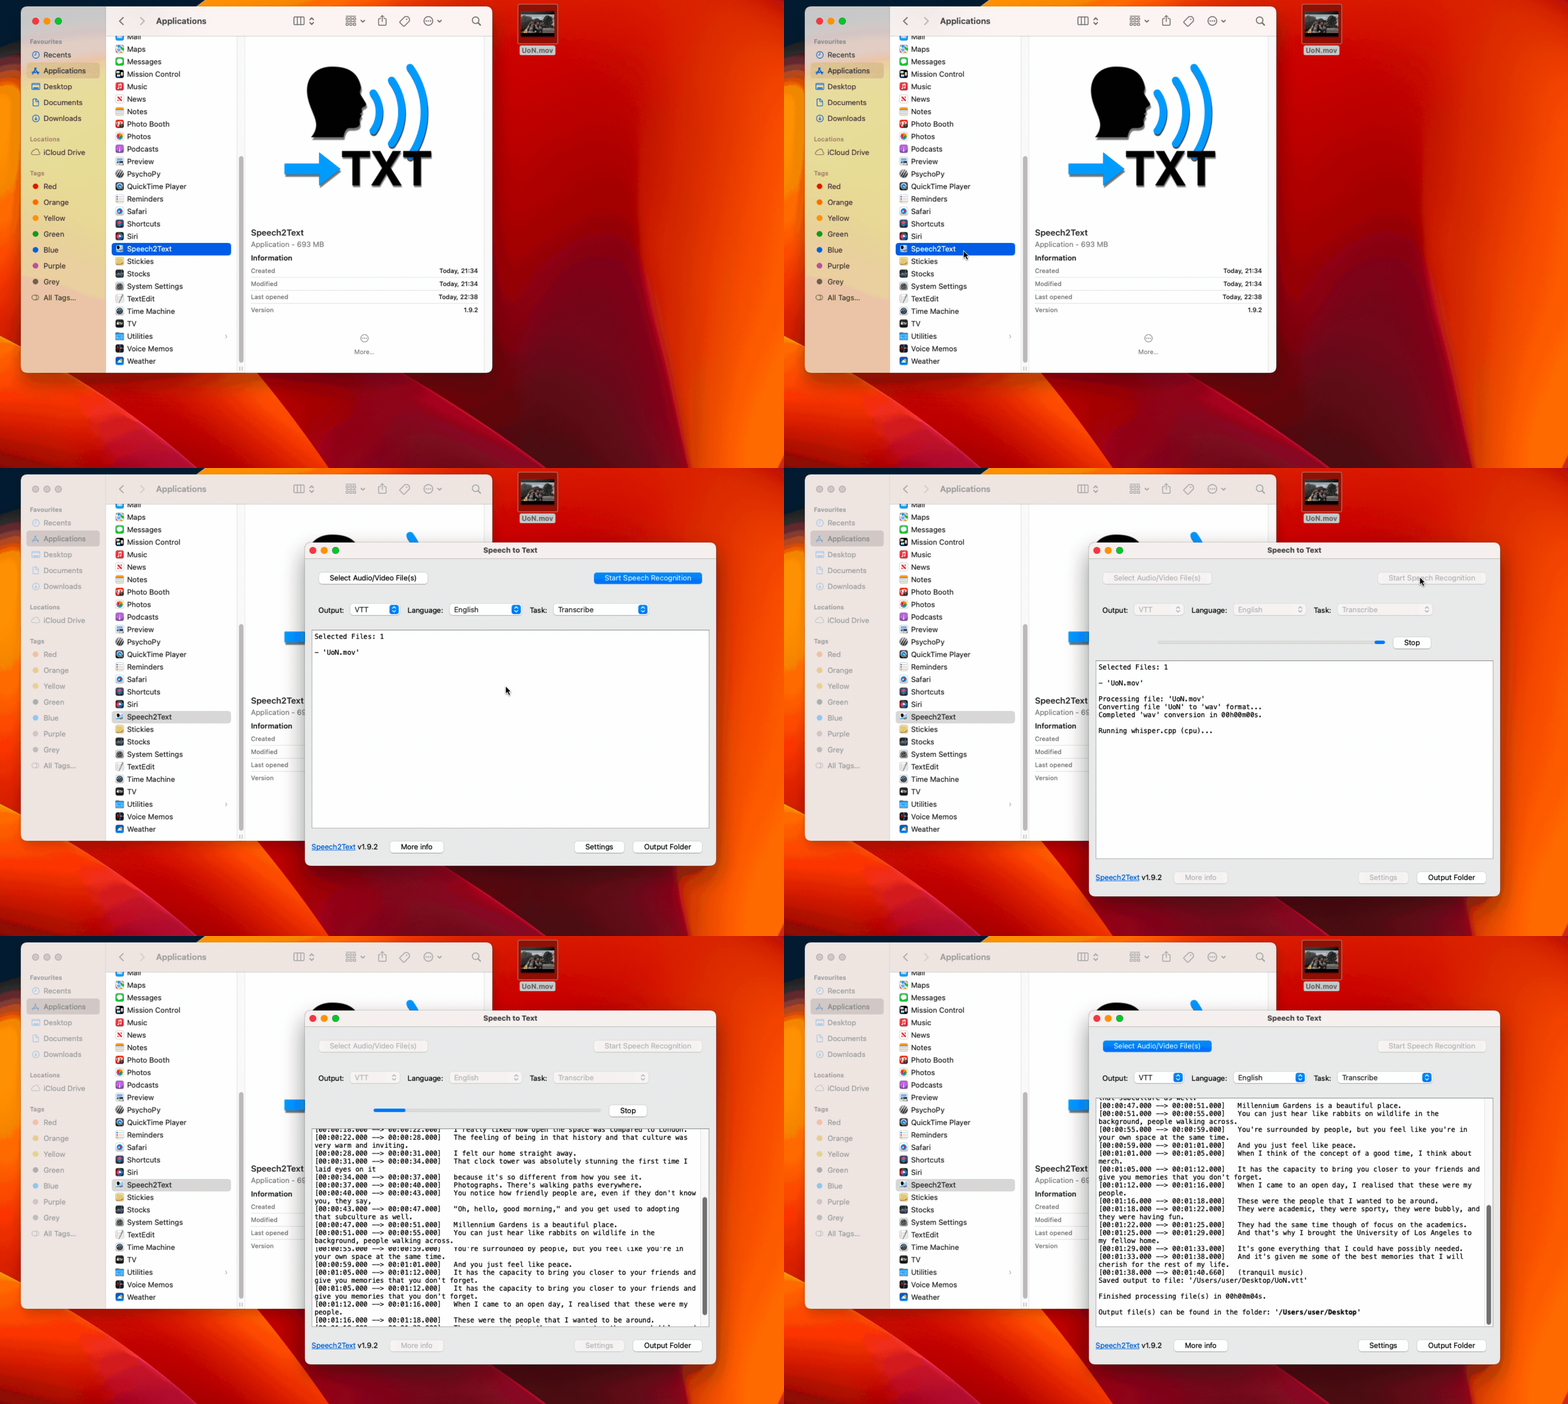
Speech2Text

Speech2Text is an application that provides a simple and easy-to-use graphical user interface for different automatic speech recognition (ASR) systems and services based on OpenAI's Whisper (mlx-whisper, whisper.cpp, faster-whisper, whisper ASR webservice, and the whisper API). Speech2Text transcribes the speech in audio and video files (e.g., .mp3, m4a, .wav, .mp4, .mov). The output is a text or subtitle file (.vtt or .srt). When you select OpenAI's Whisper, mlx-whisper, whisper.cpp, or faster-whisper, the ASR runs locally on your computer.
The application will work with wav files and it will convert mp3, mp4, mov, avi, and other audio/video files to (16 kHz, 16-bit) wav files. MLX-Whisper and Whisper require that FFmpeg is installed (FFmpeg installation instructions).
The application uses by default mlx-whisper on Apple Silicon Macs and on Intel Macs and Windows whisper.cpp is used with the 'base' model for transcribing speech. Both of these implementations of Whisper are much faster than the original OpenAI's Whisper. To improve the accuracy of the transcription, select the medium or one of the large models in the Settings (e.g., large-v2 or large-v3-turbo). The medium and large models improve, in particular, accuracy of transcribing foreign names, specialist terminology, poor/noisy recordings and accented speech. However, these models require a powerful computer because the transcription process is processor/GPU intensive and requires a large amount of memory (transcription speed info).
Download
Version: 2.3.2 (12 April 2025)
- Speech2Text for Macs with Apple silicon (M1, M2, and later) (DMG file)
- Speech2Text for Macs with Intel processor (DMG file)
- Speech2Text for Windows (zip file)
What's new in version 2.3.2
- Improved file selector dialog.
- Updated mlx to 0.24.2.
- Updated whisper.cpp to 1.7.5.
Installation and starting Speech2Text
On MacOS open the DMG file and drag Speech2Text to the Applications folder. On Windows double click on the "Speech2Text_Setup.zip" to open the zip file that contains the installer. Next, double click "Speech2Text Setup" to install Speech2Text.
The app is not code signed. Therefore, you will see a security message when you start the application for the first time or run the installer. Below are instructions to open the app in macOS and to run the installer in Windows.
macOS Sequoia
The first time you start the application on macOS (double click on the application icon in Finder), you will see the dialog box below. Click on the button "Done".

To open the App, go to the Settings and then select "Privacy & Security", enable Allow applications from "App Store & Known Developers", and click on the button "Open Anyway".

Next, a dialog box will appear and click again on the button "Open Anyway".

Finally, enter your password to allow the application to Open now and in the future.

macOS Sonoma and earlier
The first time you start the application on macOS (double click on the application icon in Finder), you will see the dialog box below:

Please note that starting the application the first time might take a while.
To fix the security warning, right-click on the application icon in the Finder, and then select in the popup menu "Open". Next, you will see this message:

Select "Open" and then it will take a few seconds before the app starts. The security warning will now not appear anymore for this app and the application should start up quickly.
Windows
The following message will appear when you start the installer.

Click on "More info", and the following message will appear.

Click on "Run anyway" to start the installer.
Transcription speed
Tables 1 and 2 provide some indication of how long it takes for different Whisper implementations in Speech2Text (v2.2.2) to generate captions (VTT file) for a 19-minute audio recording (times based on 2nd run).
| MacBook Pro (M1 Max)a | PC (i9 + RTX A4000)b | ||
|---|---|---|---|
| whisper | 4m15s | 2m49s | |
| MLX whisper | 13s | NA | |
| whisper.cpp (CPU) | NA | 1m33s | |
| whisper.cpp (CUDA) | NA | 22s | |
| whisper.cpp (Metal) | 22s | NA | |
| faster-whisper (CPU, int8) | 59s | ||
| a14" MacBook Pro (macOS 15.1.1, 32 GB, M1 Max, 24 GPU cores). bThinkStation P360 (Windows 11, 32 GB, Intel i9 12th gen, RTX A4000). | |||
| MacBook Pro (M1 Max)a | PC (i9 + RTX A4000)b | ||
|---|---|---|---|
| whisper | |||
| MLX whisper | 1m31s | NA | |
| whisper.cpp (CPU) | NA | 21m17s | |
| whisper.cpp (CUDA) | NA | 1m51s | |
| whisper.cpp (Metal) | 3m50s | NA | |
| faster-whisper (CPU, int8) | |||
| a14" MacBook Pro (macOS 15.1.1, 32 GB, M1 Max, 24 GPU cores). bThinkStation P360 (Windows 11, 32 GB, Intel i9 12th gen, RTX A4000). | |||
Install FFmpeg
Instructions how to install FFmpeg can be found in the sections below.
macOS
Open the Terminal in macOS.
If you have not yet installed Homebrew (brew) on your computer, follow the instruction on this website: https://brew.sh
Next, enter the following command to install FFmpeg.
%brew install ffmpeg
Windows
You can use Scoop or Chocolatey to install FFmpeg on Windows.
Open the PowerShell Terminal in Windows.
Scoop
If you have not yet installed scoop on your computer, follow the instruction on this website: https://scoop.sh
Next, enter the following command to install FFmpeg.
>scoop install ffmpeg
Chocolatey
If you have not yet installed Chocolatey on your computer, follow the instruction on this website: https://community.chocolatey.org
Next, enter the following command to install FFmpeg.
>choco install ffmpeg
Source code
The source code is available at https://github.com/waltervanheuven/speech2text.
If you have any questions, contact Walter van Heuven
Known issues
- OpenAI's whisper and mlx-whisper require that FFmpeg is installed.